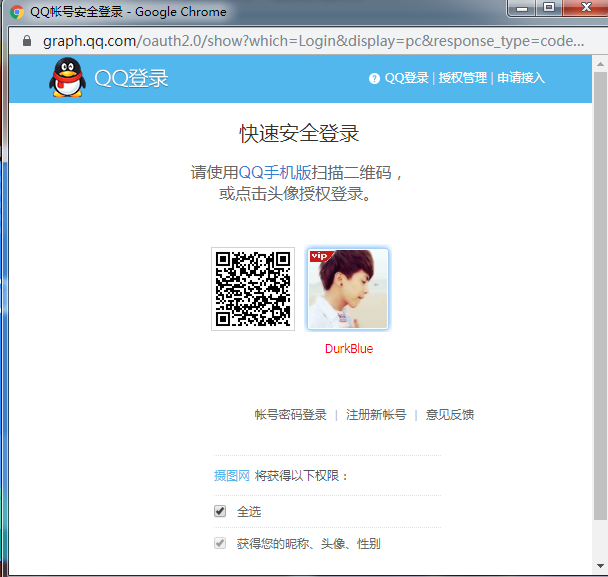
 摘要: 最终效果如下:接入QQ登录前,网站需首先进行申请,获得对应的appid与appkey,以保证后续流程中可正确对网站与用户进行验证与授权。申请地址:qq互联整个流程为:接入后 拿到A...
 最终效果如下:
接入QQ登录前,网站需首先进行申请,获得对应的appid与appkey,以保证后续流程中可正确对网站与用户进行验证与授权。
申请地址:qq互联
整个流程为:
接入后 拿到APP_ID、APP_Key、callback(回调地址), 下面将用到。
1、新建一个控制器,命名为User
1 2 3 4 5 6 7 8 9 10 11 12 13 14 15 16 17 18 19 20 21 22 23 24 25 26 27 28 29 30 31 32 33 34 35 36 37 38 39 40 41 42 43 44 45 46 47 48 49 50 51 52 53 54 55 56 57 58 59 60 61 62 63 64 65 66 67 68 69 70 71 72 73 74 75 76 77 78 79 80 81 82 83 84 85 86 87 88 89 90 91 92 93 94 95 96 97 98 99 100 101 102 103 104 105 106 107 108 109 110 111 112 113 114 115 116 117 118 119 120 121 122 123 124 125 126 127 128 129 130 131 132 133 | namespace app\index\controller;use think\Config;use think\Session;use think\Cookie;use think\Db;class User extends \think\Controller{ // 点击qq登录按钮 public function login(){ if(Cookie::has('user')) { $user = Db::name('user')->where(['login_string'=>Cookie::get('user')])->find(); if(empty($user)){ Cookie::delete('user'); } else { $this->redirect('index/index/index'); } } //把第一次访问之前的url存入Session待用 if(!Session::has('user_url')){ Session::set('user_url',$this->request->param('url')); } $config = Config::get('thirdlogin.qq'); // 获取回调地址 $url = $config['callback']; $redirect_uri = urlencode($url); $appid = $config['appid']; //$appsecret = $config['appsecret']; Session::set('state',md5(uniqid(rand(), TRUE))); // 获取code码,用于和QQ服务器申请token。注:依据OAuth2.0,需要用户端操作 if(empty($this->request->param('code')) && !Session::has('code')){ //以下信息可安放在用户登录界面上: $url= 'https://graph.qq.com/oauth2.0/authorize?response_type=code&client_id=' .$appid.'&redirect_uri='.$redirect_uri.'&scope=get_user_info&state=' .Session::get('state'); header('Location:'.$url);//跳转到第三方登录入口 exit; } } // 用户点击头像后的回调 public function callback(){ $appid = $config['appid']; $appsecret = $config['appsecret']; $url = $config['callback']; $redirect_uri = urlencode($url); // 依据code码去获取openid和access_token,自己的后台服务器直接向QQ服务器申请即可 if (!empty($this->request->param('code')) && !Session::has('token')){ Session::set('code',$this->request->param('code')); $url="https://graph.qq.com/oauth2.0/token?client_id=".$appid. "&client_secret=".$appsecret."&code=".Session::get('code')."&grant_type=authorization_code" ."&state=".Session::get('state')."&redirect_uri=".$redirect_uri; $res = $this->https_request($url); $res = explode("&",$res); $token = []; foreach ($res as $k => $val) { $val = explode("=",$val); $token[$val[0]] = $val[1]; } } // 依据申请到的access_token和openid,申请Userinfo信息。 if (isset($token['access_token'])){ $url = "https://graph.qq.com/oauth2.0/me?access_token=".$token['access_token']; $openid = $this->https_request($url); if (preg_match('/\"openid\":\"(\w+)\"/i', $openid, $match)) { $openid = $match[1]; } $url = "https://graph.qq.com/user/get_user_info?oauth_consumer_key=".$appid."&access_token=" .$token['access_token']."&openid=".$openid.'&format=json'; $userinfo = $this->https_request($url); $userinfo = json_decode($userinfo,true); Session::delete('code'); Session::delete('state'); $user_url = Session::get('user_url'); Session::delete('user_url'); //从这里开始根据自己的程序修改 if(!empty($userinfo)){ $user = Db::name('user')->where(['openid'=>$openid])->find(); $salt = salt(create_code(20)); if(empty($user)) { if($user['status'] == -1) { return $this->error('你已被拉黑'); } $data = [ 'name' => $userinfo['nickname'], 'openid' => $openid, 'gender' =>$userinfo['gender'], 'thumb' => $userinfo['figureurl_qq_1'], 'login_string' => $salt, 'create_time' => time(), 'last_login_time' => time(), 'last_login_ip' => $this->request->ip(), 'login_num' => 1, ]; if(false == Db::name('user')->insert($data)){ return $this->error('登录失败'); } } else { if(false == Db::name('user')->where('id',$user['id'])->update(['login_string'=>$salt,'last_login_time'=>time(),'last_login_ip'=>$this->request->ip(),'login_num'=>$user['login_num']+1])) { return $this->error('登录失败'); } } Cookie::set('user',$salt,7200); $this->redirect($user_url); } else { return $this->error('未知错误'); } //这里结束 } } protected function https_request($url, $data = null) { $curl = curl_init(); curl_setopt($curl, CURLOPT_URL, $url); curl_setopt($curl, CURLOPT_SSL_VERIFYPEER, FALSE); curl_setopt($curl, CURLOPT_SSL_VERIFYHOST, FALSE); if (!empty($data)){ curl_setopt($curl, CURLOPT_POST, 1); curl_setopt($curl, CURLOPT_POSTFIELDS, $data); } curl_setopt($curl, CURLOPT_RETURNTRANSFER, 1); $output = curl_exec($curl); curl_close($curl); return $output; }} |
以上代码就是本博客的登录代码,部分内容需根据自己程序的需要进行修改后才能使用。
2、在配置文件中加入上面说的 相应的配置项
1 2 3 4 5 6 7 | //QQ第三方登录'thirdlogin'=>[ 'qq' => [ 'appid' => '', 'appsecret' =>'', 'callback' =>'',//回调地址 ], |
3、如果你是非ThinkPHP5的PHP程序,把代码里的Session、Cookie等方法改成PHP原生的即可。
注意:在请求新建的User控制器的login()方法时,需要传递一个参数user_url,作为用户在完成登录后的跳回页面,这个参数的值建议为用户请求登录的页面地址。


